It is possible to import all appointments from an Outlook calendar to Daysi, so that all appointments can be collected in Daysi.
It is a standard feature in Outlook-365 that is used to get a LINK/URL to the calendar.
Below is a brief description of how appointments are imported from Outlook.
Setting up Outlook
Step 1: Log in to Outlook 365
1 : Select the Outlook Calendar
2: Click the Gear/Settings icon at the top right of the window.
3 : A window opens with a number of different options:
4 : Select the Shared Calendars item
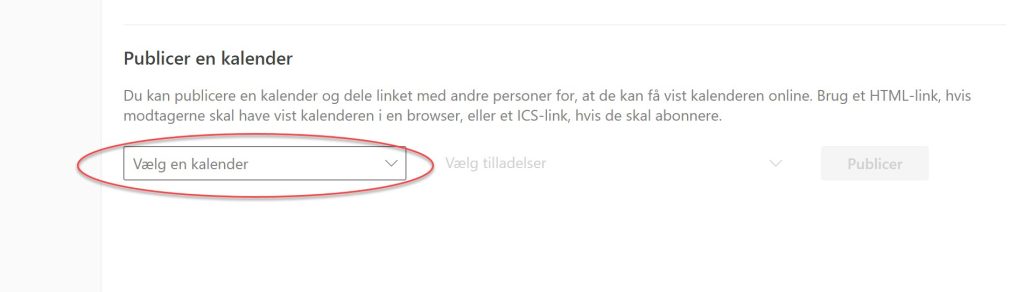
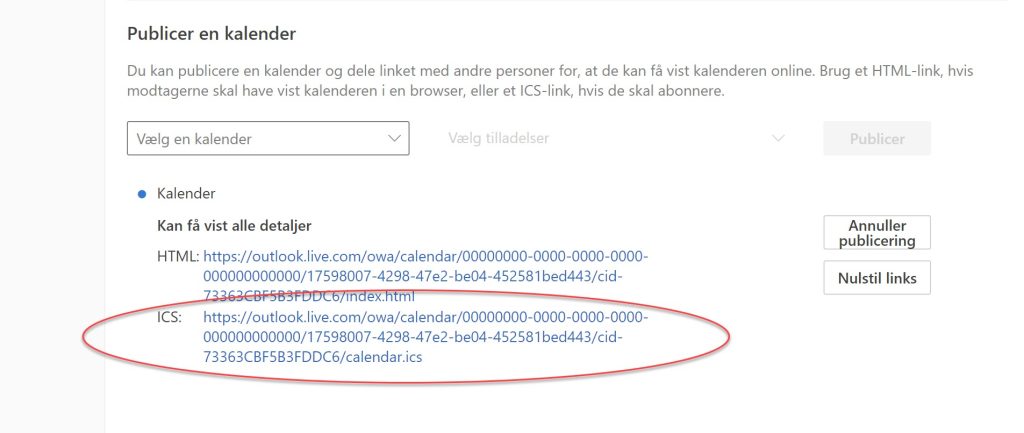
5. Click the Select a calendar field and select the calendar you want to have access to.
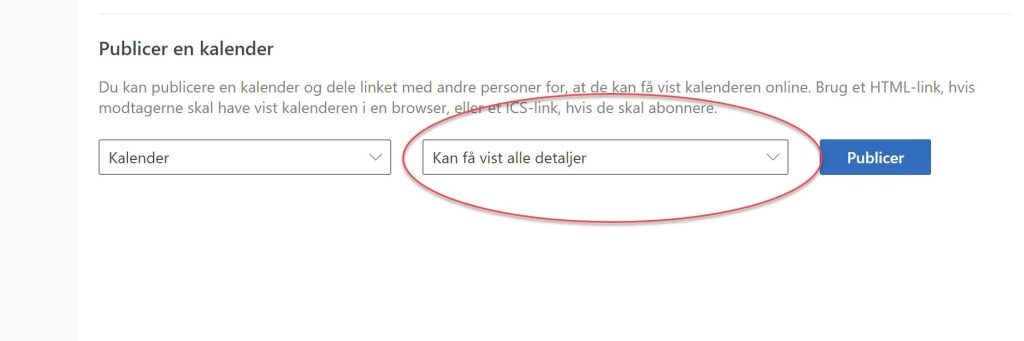
6. In the Select permissions field, select the Can view all details option.
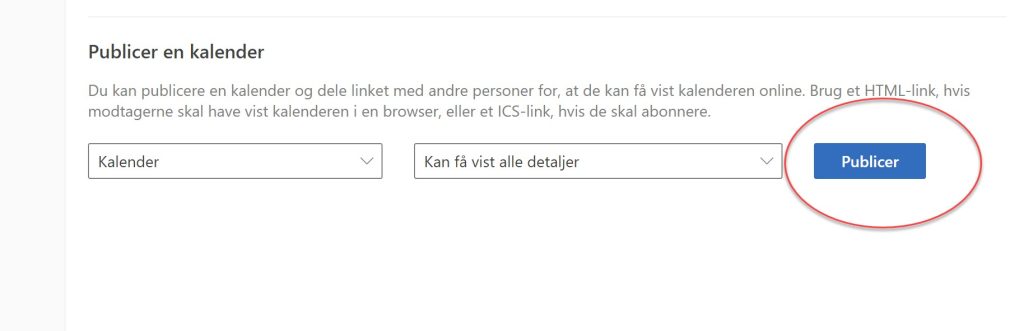
7. Click the Publishfield to display Links to the calendar.
8. The link you need to access the calendar via Daysi will then be displayed.
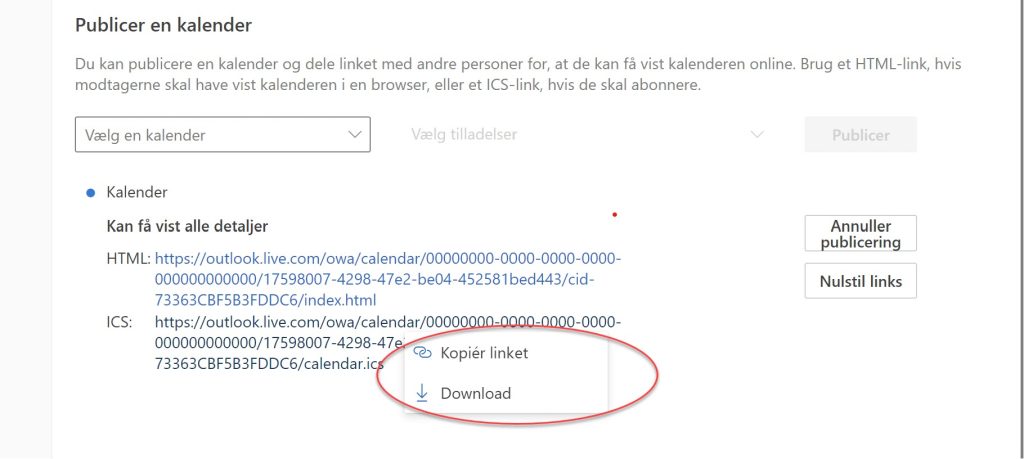
9. Click the mouse on the link and copy it to the memory of the computer.
10. The link must now be sent to your phone – e.g. via email so you can create it in Daysi.
Creating Links in the Daysi App
Step 1: Open Family Member Setup
The Link you downloaded from Outlook-365 must be created in Daysi so that all appointments from your Outlook calendar are synchronized to Daysi.
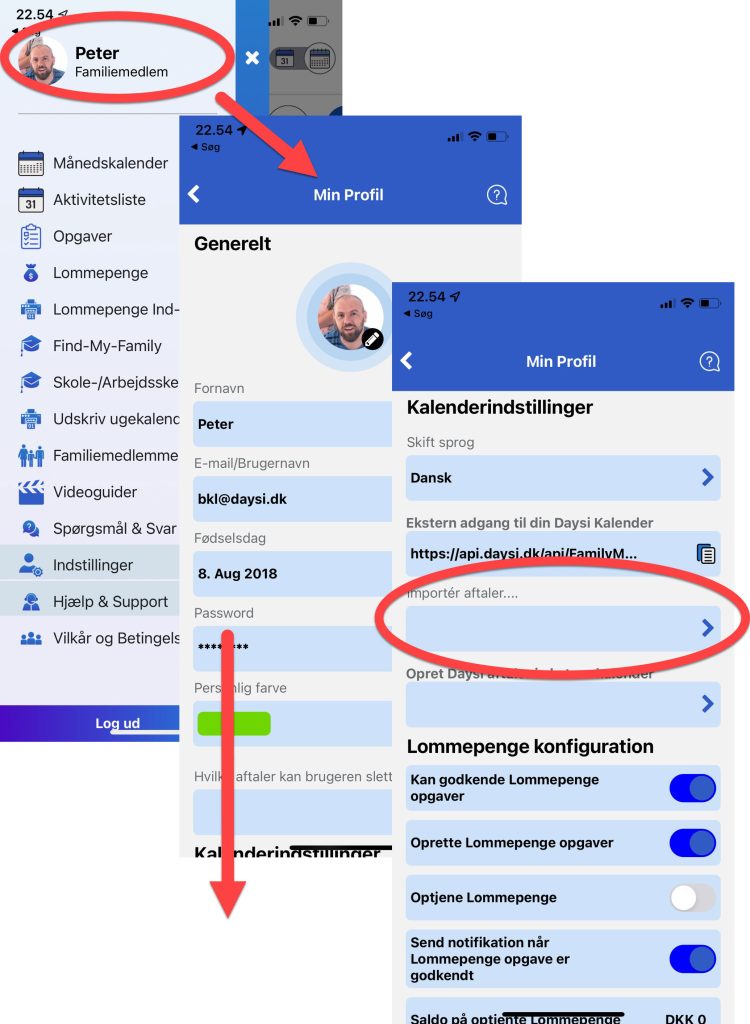
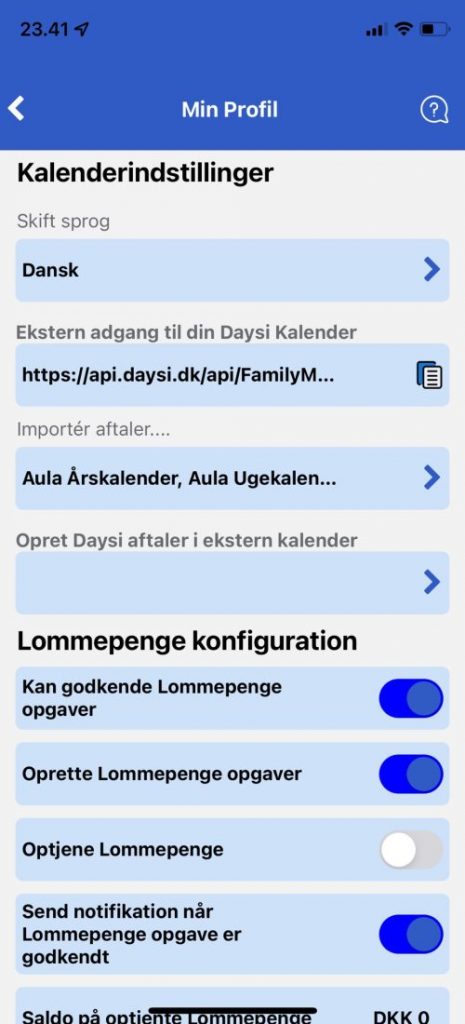
Open the Menu and click on your Picture/Name at the top to open My Profile, where you configure your calendar.
Scroll down to the Calendar Settings section and click the arrow in the Import Appointments section .
Step 2: Create Link to Outlook Calendar
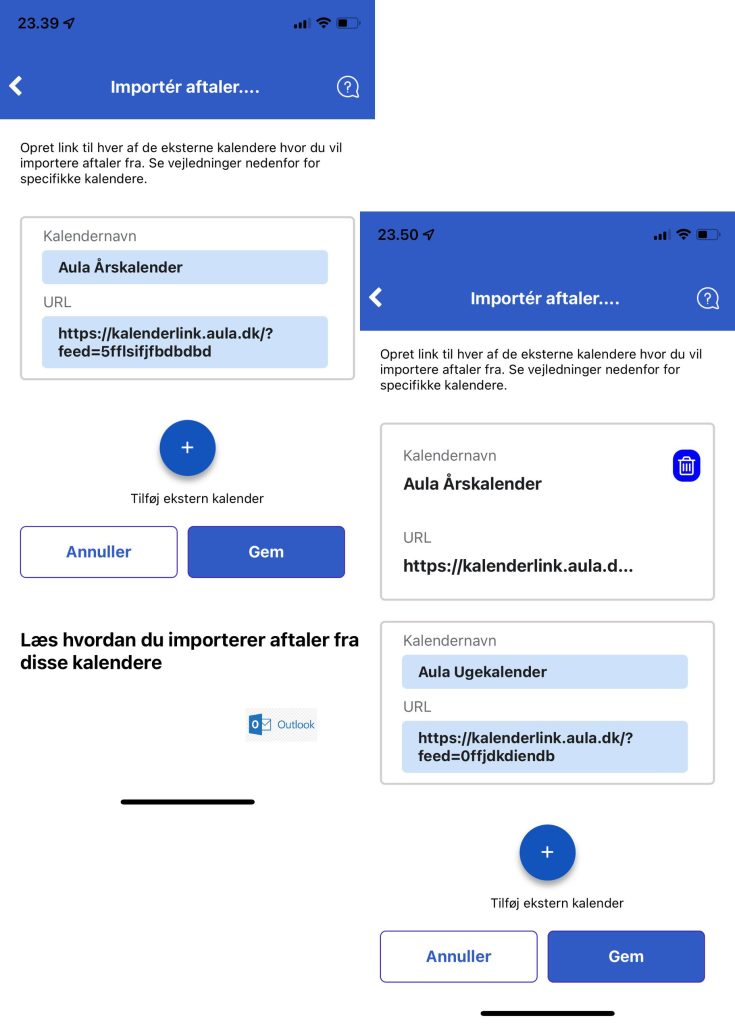
Once you have selected the Import appointments function , a new window will open where you can create the link to the Outlook calendar.
This is done in the following way.
1: In the first field, you must enter a name for the calendar that is being imported – this is the name that will be displayed on the appointment in Daysi so that you can see which external calendar the appointment was created from.
2: In the second field, insert the link that you have downloaded from the Outlook calendar (you can optionally send the link to yourself in an email so that you can open it via your phone)
3: Then click the SAVEbutton.
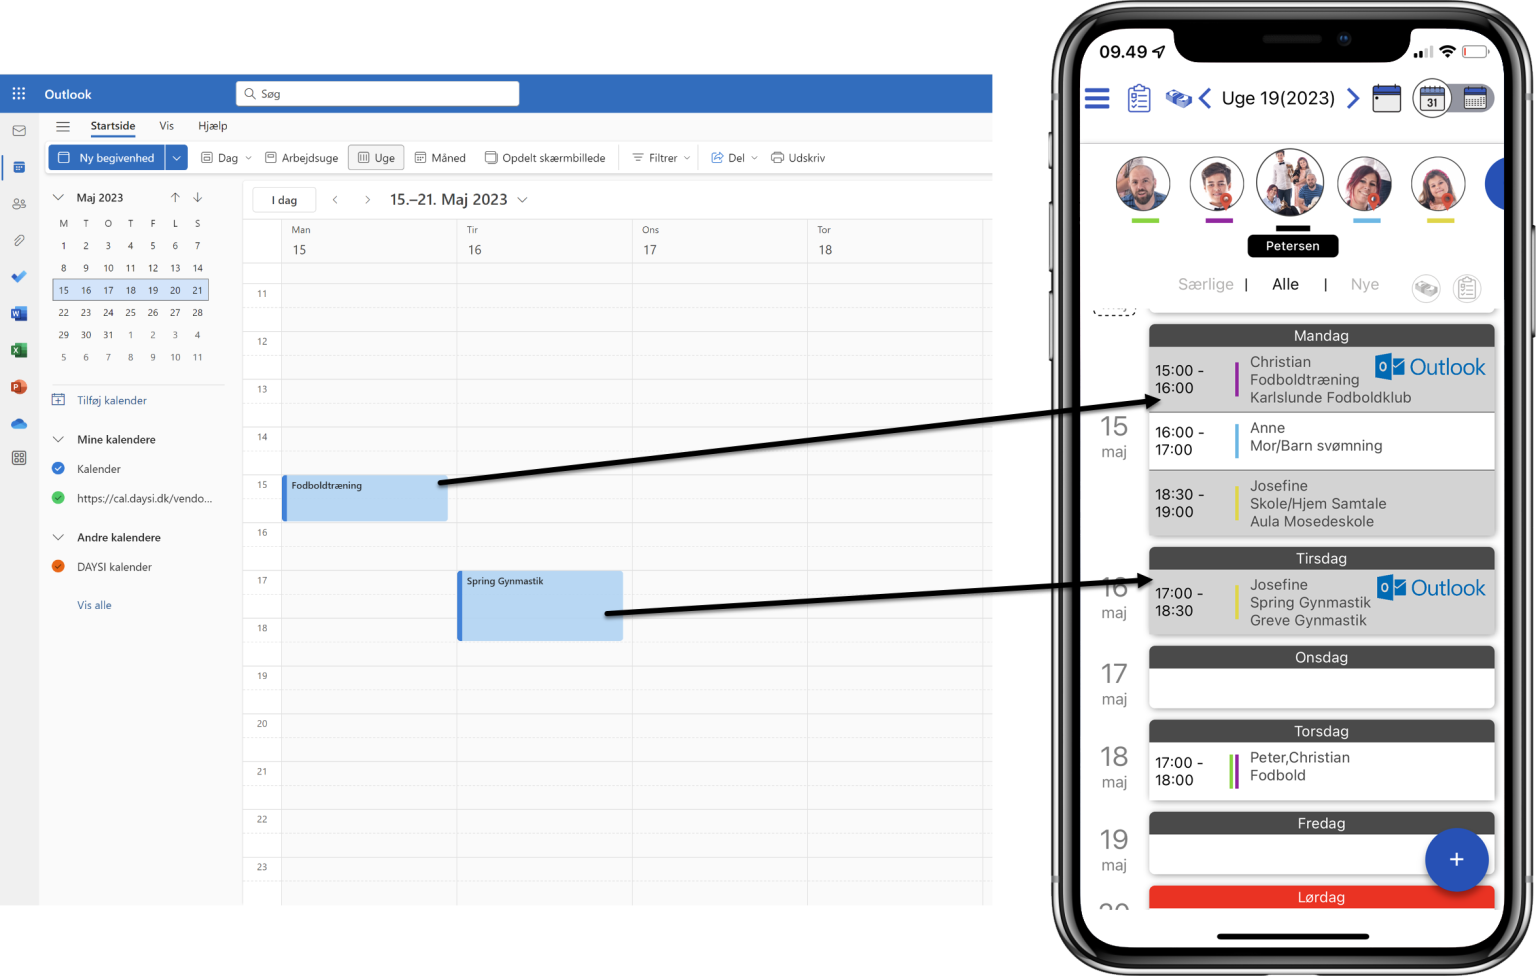
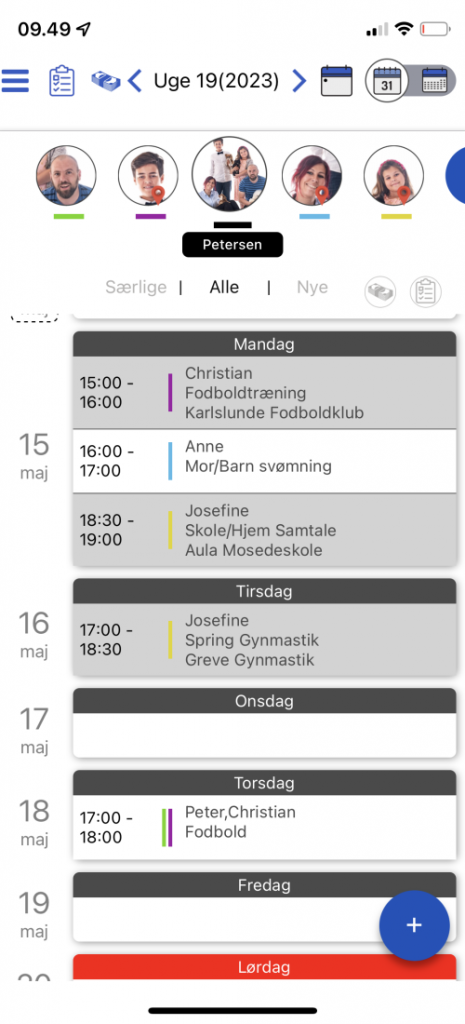
The appointments will then be synchronized from the external calendar and entered into Daysi. The appointments will be created on the Family member to whom the calendar is associated.
Appointments from the Outlook calendar are retrieved immediately and then synchronized every night to the Daysi calendar.
Step 3: Finish configuration
When you have finished creating the various links to the external calendars, click SAVE and the window will then close.
It is now also possible in the configuration overview to see the calendars from which appointments are synchronized.
Step 4: Viewing appointments in the Daysi Calendar
When appointments are synchronized to Daysi from an external calendar, they are displayed with a light gray background, so that they are easy to recognize. The description of the appointment and where the appointment is are of course displayed and in addition you can see which external calendar the appointment is synchronized from.