Import Appointments from Kampklar - Family Calendar

Configuring Daysi & Match Ready Calendar
It is possible to import all appointments from the Kamklar Calendar(s) you have so that they are displayed in Daysi.
The appointments are added to the calendar of the Family Member to whom they are associated and become visible to everyone in the Family.
That is, if both parents and children have a Kampklar calendar, Daysi can be configured so that the appointments are displayed for each family member.
Below is a brief description of how agreements are imported from Kampklar.
Setting up the Team Sports Calendar
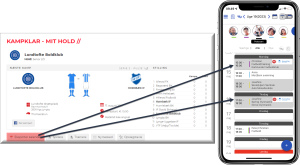
Step 1: Open your Battle Ready Calendar on your computer
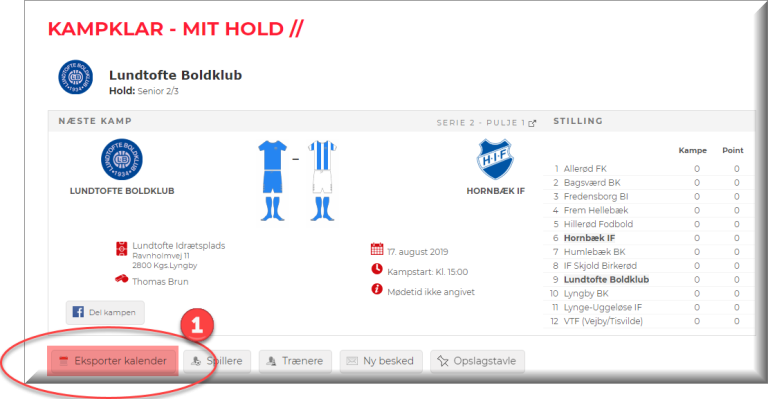
1: Click the Export Calendar button in the My Team window in Match Ready.
A new window will open where you can save the link to the calendar.
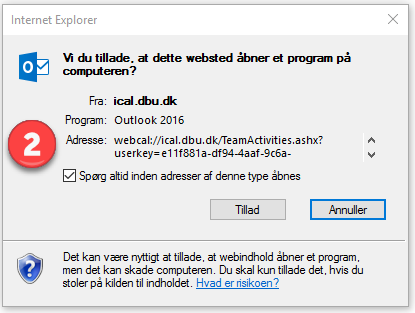
2: Right-click on the link and save it to your computer.
Tip : You can also right-click the button in the previous window and save the link from there.
You will need this link for Daysi so that all your appointments are entered into the Daysi calendar – read below how this is done.
Creating Links in the Daysi App
Step 1: Open Family Member Setup
The Link you have downloaded from your Team Sports Calendar must be created in Daysi so that all appointments from your Team Sports are synchronized to Daysi.
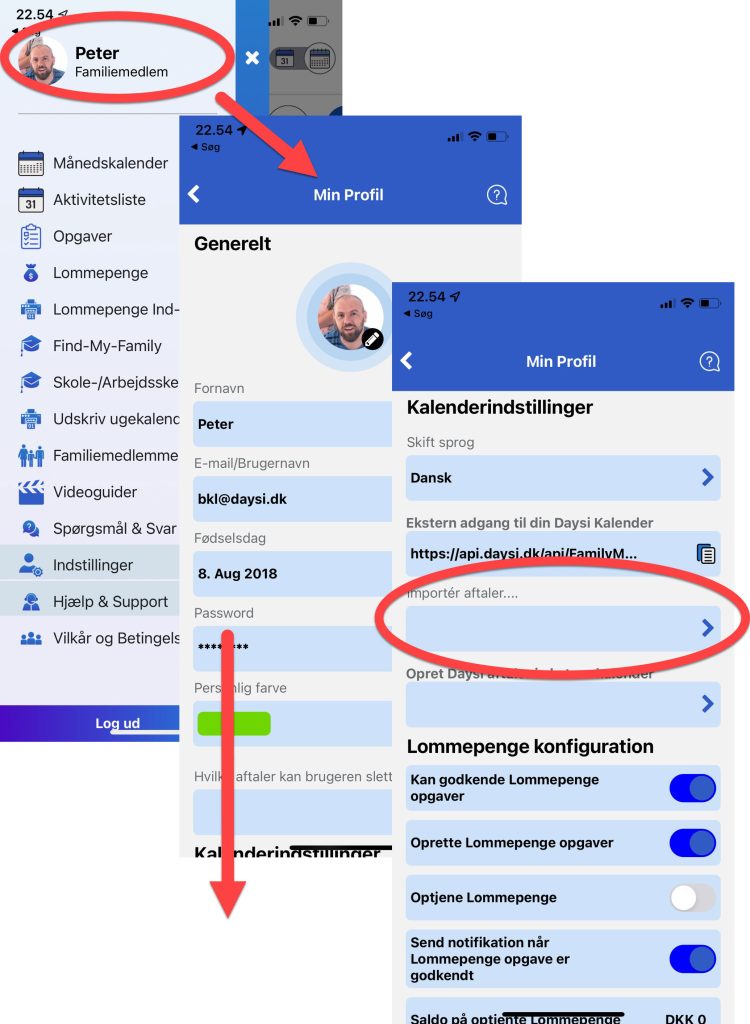
1: Open the Menu and click on your Picture/Name at the top to open My Profile where you configure your calendar.
Tip : If you need to configure this for another family member, you can, as the Daysi Family Administrator, select Family Members from the menu and from here select the Family Member to whom the appointments should be added.
2: Scroll down to the Calendar Settings section and click the arrow in the Import Appointments section .
Step 2: Create Link to Team Sports Calendar
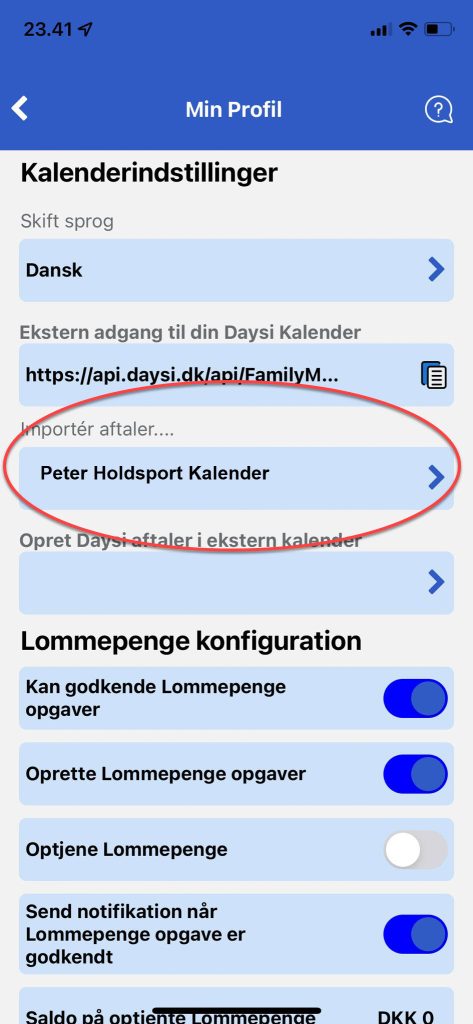
Once you have selected the Import appointments function , a new window will open where you can create the link to the Team Sports calendar.
This is done in the following way.
3: In the first field, you must enter a name for the calendar being imported – this is the name that will be displayed on the appointment in Daysi. The text makes it easy to see where the appointment comes from.
4: In the second field, you must insert the link that you have downloaded from the Holdsport Kkalenderen (you can possibly send the URL/Link to yourself in an email so you have it on your phone.)
5: Then click the SAVE button.
- The appointments will then be synchronized from the external calendar and entered into Daysi.
- The agreements are created on the Family member for whom the configuration is made.
- The appointments are imported into Daysi immediately and subsequently synchronized every night.
Step 3: Finish configuration
When you are finished creating the various links to the external calendars, click SAVE and the window will then close.
It is now also possible in the configuration overview to see the calendars from which appointments are synchronized.
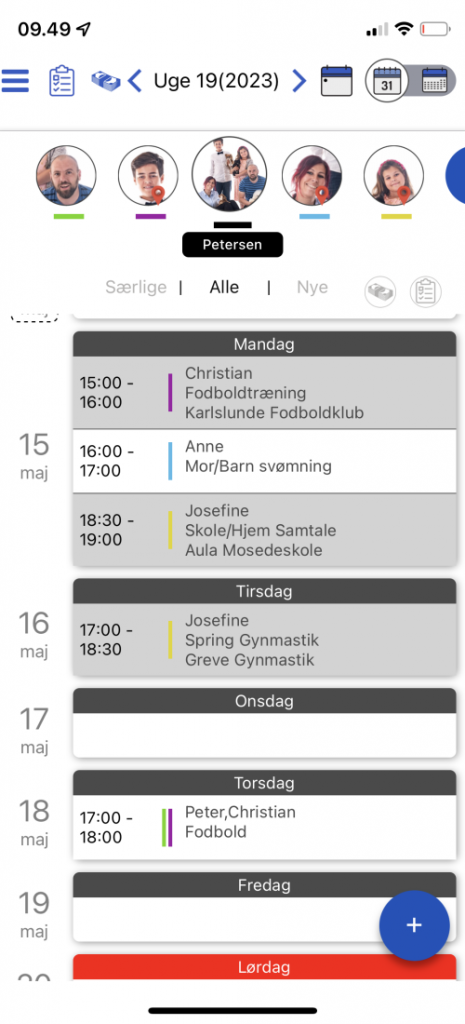
Step 4: Viewing appointments in the Daysi Calendar
When appointments are synchronized to Daysi from an external calendar, they are displayed with a light gray background, so that they are easy to recognize. The description of the appointment and where the appointment is are of course displayed and in addition you can see which external calendar the appointment is synchronized from.
An example can be seen below.